
The Art of Food Photography: Making Dishes Look Delicious
Learn the fundamentals of food photography to capture stunning images of your culinary creations. Master lighting, composition, and styling techniques.
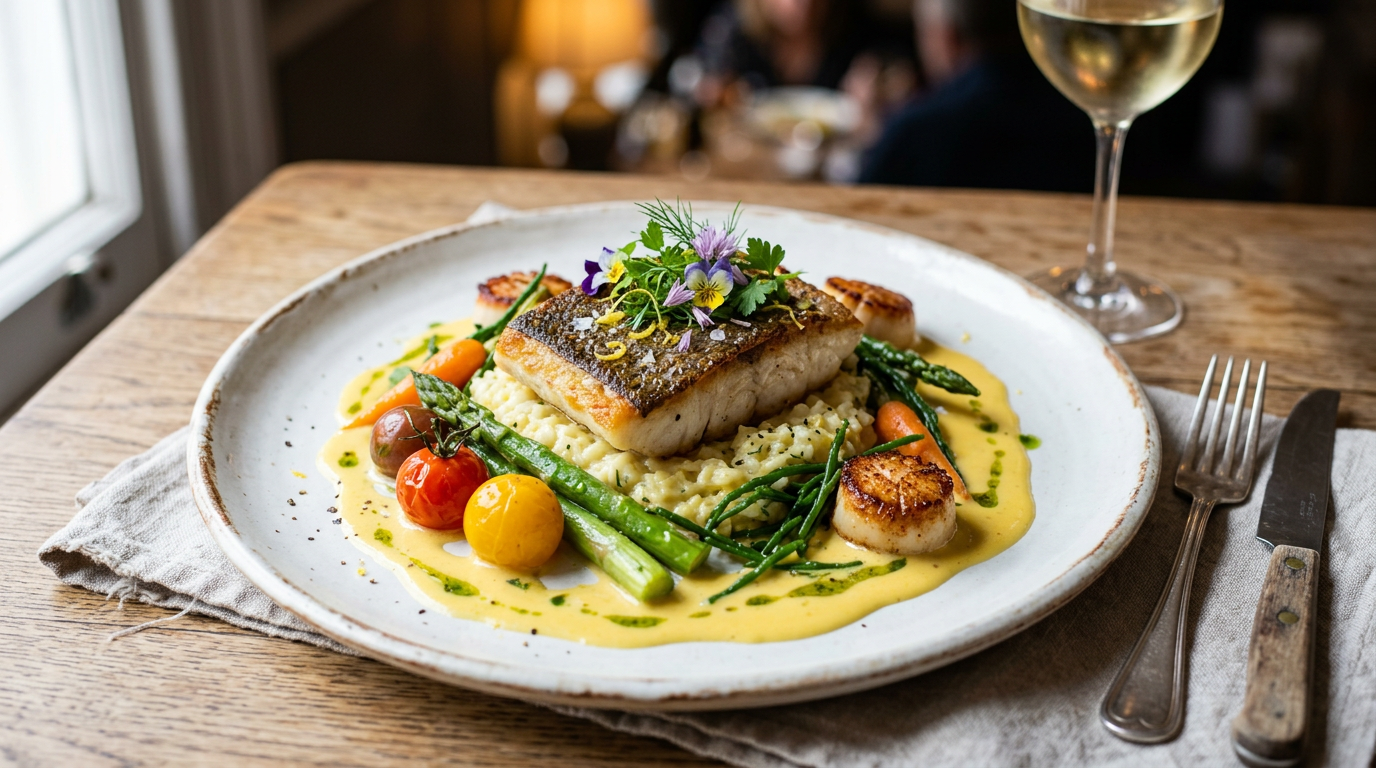
In today's visual culture, food photography has become an essential skill for food bloggers, restaurant owners, and home cooks who want to share their creations. A well-photographed dish can make mouths water before a single bite is taken, while a poorly lit photo can make even the most delicious meal look unappetizing. The good news is that you don't need expensive equipment or professional training to take great food photos. With some basic knowledge of lighting, composition, and styling, you can capture images that do justice to your culinary efforts.
When it comes to equipment, camera options range from a modern smartphone to a DSLR or mirrorless camera. A smartphone has an excellent camera, is convenient and always available, lets you use portrait mode for shallow depth of field, and can be edited with apps like Lightroom Mobile or Snapseed. A DSLR or mirrorless camera gives you greater control over settings, interchangeable lenses for different effects, better performance in low light, and higher resolution for printing or cropping. For lenses, a 50mm f/1.8 is excellent for food photography and offers a natural perspective, a macro lens is useful for extreme close-ups of textures and details, and a 35mm lens gives a wider angle for table scenes and flat lays. Lighting equipment can include natural light, which is the best option because it is free and flattering, reflectors to bounce light and fill shadows, with a white foam board working well, diffusers to soften harsh light, such as a white sheet or shower curtain, and continuous lights like LED panels for consistent lighting. Styling tools are also helpful: tweezers for precise placement of garnishes, brushes for applying oil or sauce, a spray bottle for misting produce with water, and spatulas and tongs for arranging food.
Natural light is the gold standard for food photography because it renders colors accurately, creates soft and flattering shadows, is free and readily available, and produces a natural, appetizing look. To find good light, position your setup near a large window. North-facing windows provide consistent, soft light, while east-facing windows offer warm morning light, and direct sunlight should be avoided because it creates harsh shadows. Time of day matters as well. Morning light from 8 to 10am is warm and directional, midday light from 11am to 2pm is bright and even but may need diffusion, afternoon light from 3 to 5pm is warm and golden, and overcast days provide perfect soft, diffused light. Common lighting mistakes include using flash, which creates harsh shadows and unnatural colors; mixing natural and artificial light, which causes color casts; backlighting without fill, which creates silhouettes instead of appetizing images; and direct overhead light, which creates unflattering shadows under food.
Composition fundamentals start with the rule of thirds. Divide your frame into a 3x3 grid and place key elements along the lines or at intersections. This creates more dynamic, interesting compositions than centering your subject. Leading lines use elements in your scene to guide the viewer's eye toward the main subject, such as utensils pointing toward the dish, napkins or linens creating diagonal lines, or ingredients arranged in a path to the finished dish. Framing uses elements in the scene to frame your subject, including overhanging branches or herbs, the edges of plates or bowls, hands holding utensils, and architectural elements like window frames or shelves. Negative space means not filling the entire frame and leaving breathing room around your subject. This creates a clean, modern look, draws attention to the main subject, and provides space for text overlays for blogs or social media.
Camera angles also shape the final image. An overhead or flat lay angle is best for pizza, flatbreads, and round dishes, bowl soups and salads, multiple dishes or ingredients, and table settings and spreads. Keep the camera perfectly parallel to the surface, use a stool or ladder for stability, and arrange elements thoughtfully without making them too cluttered. A 45-degree angle is best for most plated dishes because it shows both the top and side of the food, offers a natural viewing perspective, and is versatile for various dishes. It is the most commonly used angle in food photography, shows height and layers in dishes, and works well with shallow depth of field. A straight-on or eye-level angle is best for burgers and sandwiches because it shows layers, stacked pancakes or cakes, drinks and beverages, and tall dishes with interesting sides. It emphasizes height and layers, is great for showing cross-sections, and can be dramatic and impactful.
Food styling techniques can make a noticeable difference. Prepare a hero version of your dish specifically for photography by undercooking pasta slightly because it continues cooking under lights, using less sauce to prevent sogginess, adding extra garnishes for visual appeal, and keeping components separate until shooting. For freshness, mist vegetables with water for a just-washed look, brush meat with oil for a glistening appearance, use fresh, vibrant herbs rather than wilted ones, and create steam by microwaving a damp paper towel for 30 seconds. Color and contrast matter too. Complementary colors can work well, such as orange food on blue plates. Contrast can come from dark food on light surfaces or the reverse. Garnishes add pops of color with herbs, edible flowers, or sauces, and backgrounds should complement, not compete with, the food.
Props and styling should support the dish rather than overwhelm it. Simple, neutral plates and bowls work best, and matte finishes photograph better than glossy ones. Vintage or handmade pieces add character, and size should complement the portion. Utensils should make sense for the dish. Vintage or rustic utensils add warmth, and they should be placed naturally, as if someone is about to eat. Don't overcrowd with too many props. Textured linens add visual interest, wooden surfaces provide warmth, and marble or stone looks elegant and clean. Avoid busy patterns that distract from the food.
Post-processing basics begin with exposure. Brighten underexposed images, avoid overexposing and losing detail in highlights, and make food look naturally lit rather than artificially bright. White balance should correct color casts from lighting. Food should look natural, not too warm or cool, and white plates should appear white, not yellow or blue. Contrast can be increased slightly for more pop, but avoid crushing shadows or blowing highlights, and maintain detail in both dark and light areas. Saturation and vibrance should enhance colors slightly for appetite appeal, but avoid oversaturation because it looks artificial. Vibrance is smarter than saturation because it protects skin tones. Recommended mobile apps include Lightroom Mobile, which has a free basic version, Snapseed, which is free and powerful, and VSCO, which offers presets and filters. Desktop options include Adobe Lightroom as the industry standard, Capture One as a professional alternative, and Luminar for AI-powered editing.
Some common mistakes are worth avoiding. Over-styling with too many props, garnishes, or elements distracts from the food, and less is often more. Ignoring the background is another problem, because a cluttered or distracting background pulls attention away from the dish. Keep it simple and complementary. Poor white balance makes food look too yellow, blue, or green, which is unappetizing, so correct white balance for natural colors. Over-editing with heavy filters, excessive saturation, or dramatic effects makes food look artificial, so aim for natural, appetizing results. Not cleaning up is also a mistake, because crumb-covered surfaces, sauce smears, or messy edges look unprofessional. Clean your scene before shooting.
Great food photography is achievable for anyone willing to learn the basics. Focus on natural light, thoughtful composition, and simple styling. Practice regularly, study images you admire, and develop your own style. Remember that the goal is to make food look appetizing and true to life. With these fundamentals mastered, you'll be capturing delicious images that make viewers hungry for more.


